![]()
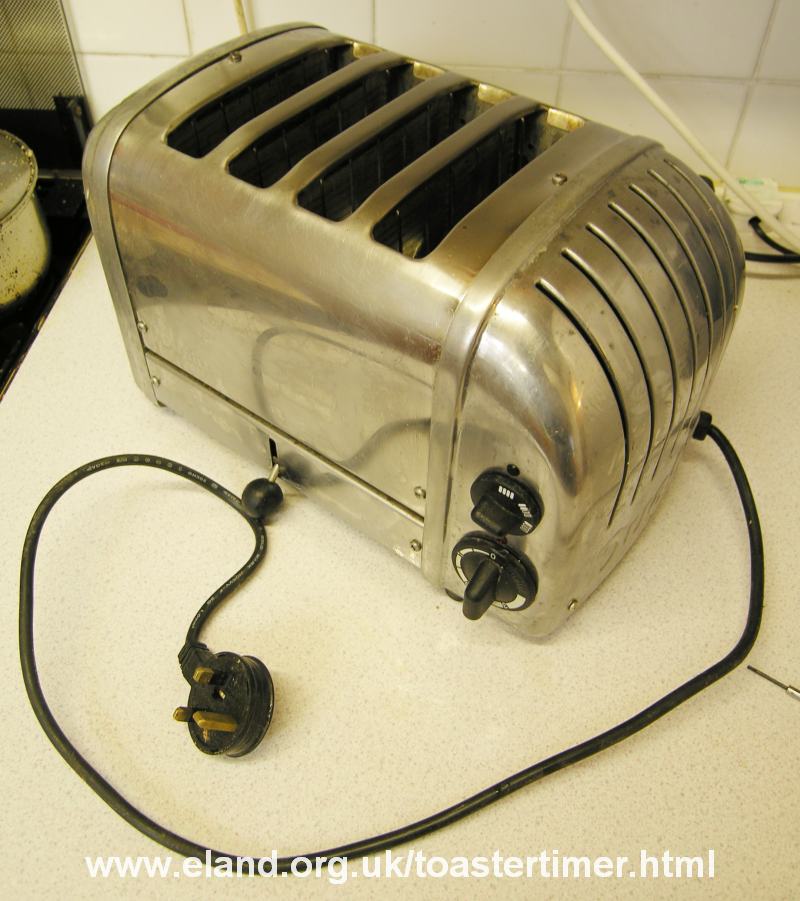
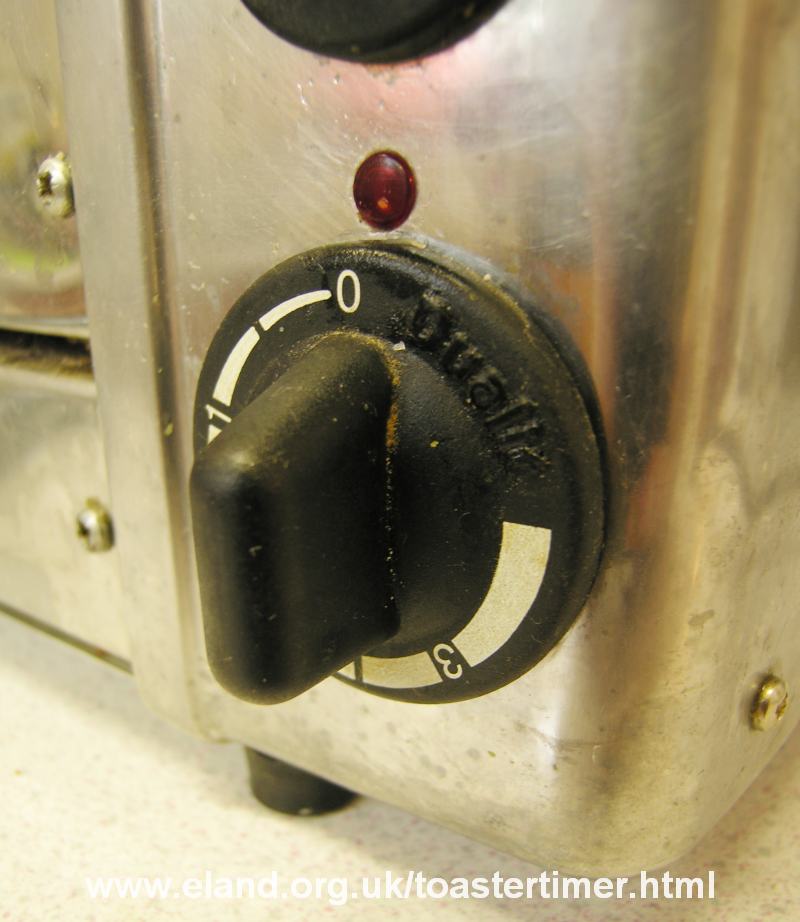
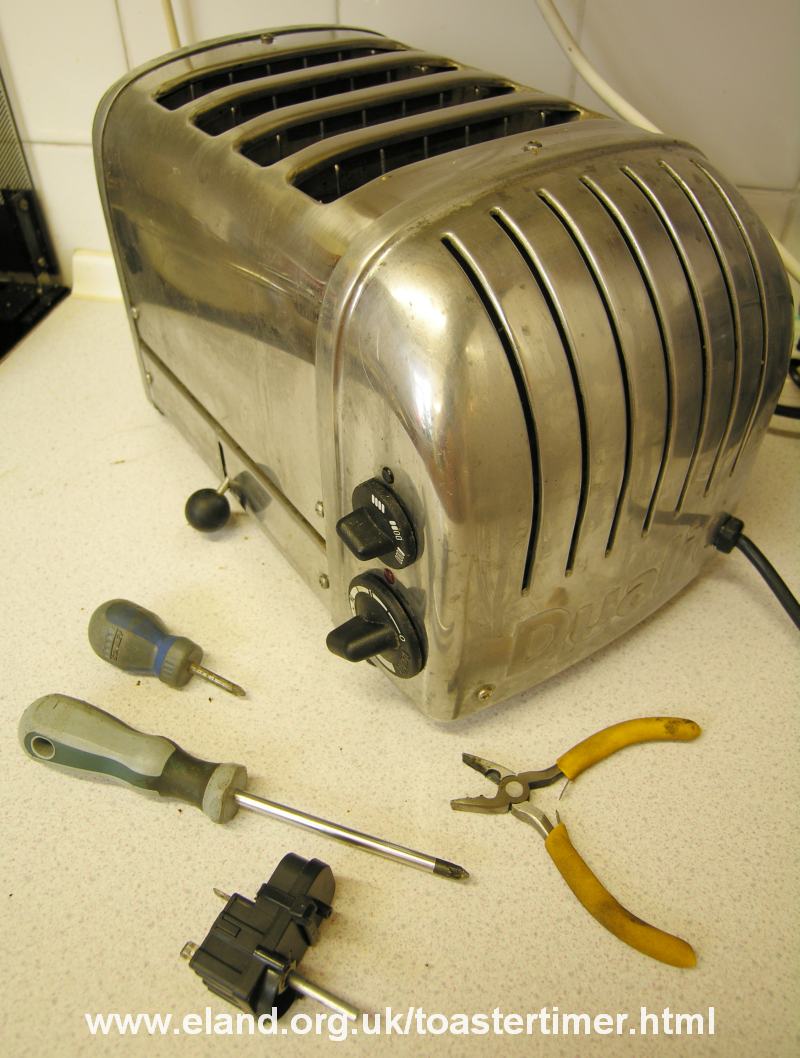
How to replace a Dualit Vario toaster timerDualit Vario toaster timer replacement - with pictures!As you may have read on my Dualit toaster element replacement page, some time ago I bought a Dualit toaster off eBay needing fixing. Now after a few years the timer has failed so I thought I'd do another page on replacing it. If, like mine, your timer fails by getting 'stuck' with the toaster still on, it's actively dangerous to use in that state. Sooner or later you'll forget it's on (as there's no ticking sound when the timer has stuck) and it'll just keep on getting hotter and hotter. Not good. So get on and replace the timer! It's an easier job than replacing an element, I'd say. Please note: This is just an account of how I did it. I am NOT a trained Dualit technician. I am NOT an electrician. If you do anything whatsoever to your toaster you do so ENTIRELY AT YOUR OWN RISK. This page is in no way endorsed by Dualit or anyone else. I have no connection whatsoever with Dualit, not even as a customer! If you have the slightest doubt as to your competence then do not do what is described here and instead go to a Dualit service agent or electrician. Right! Disclaimer out of the way, I'm assuming you have one of these, or a similar one:
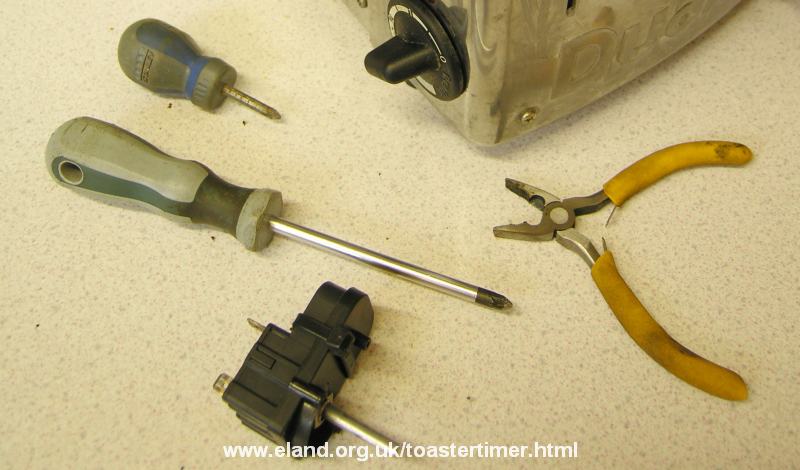
It doesn't really matter much whether it's two, four or six slots, or other detail differences between models. As far as I know all of the Dualit Vario models are pretty similar inside, so just adapt the following instructions to your particular model. In particular, some models may have more or fewer wires connecting to the timer. But as we'll see, my method means that this shouldn't cause any problems. As to tools, all you really need is a cross-head screwdriver. Ideally, you want both no. 1 and no.2 size Pozi-drive screwdrivers, and needle-nose or snall pliers may be useful too as we'll see later.
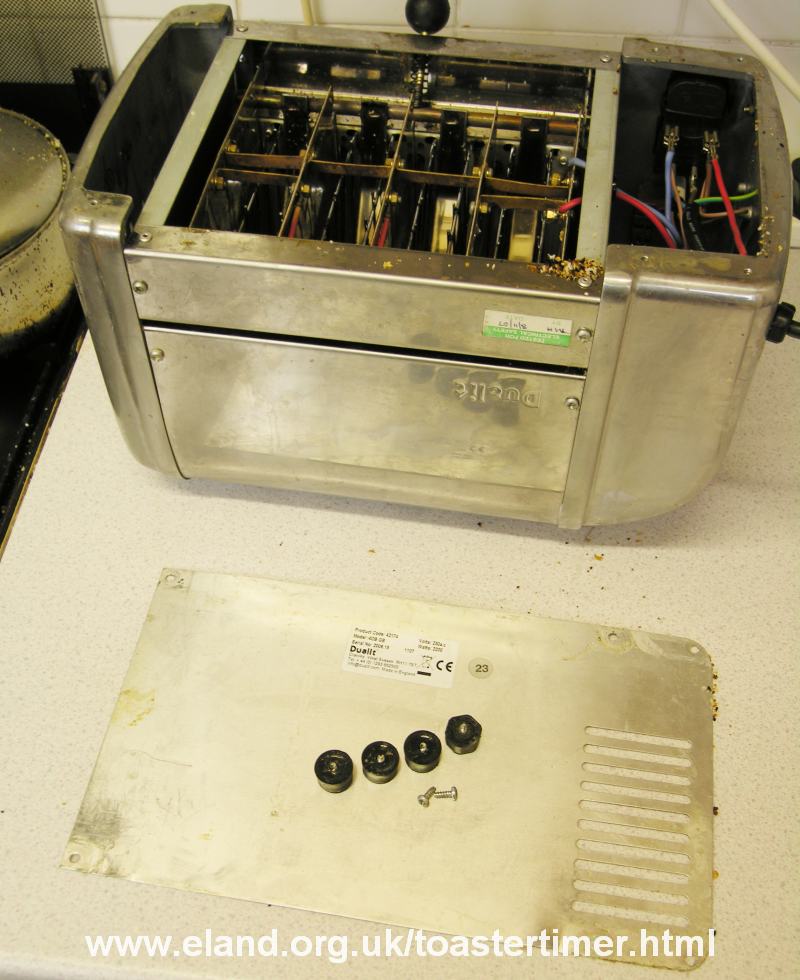
However, before we start we need to order a suitable replacement timer. I haven't found anywhere cheaper than ebay: search for "Dualit timer' to bring up the listings. There are several sellers but to be safe I'd suggest using one of the catering suppliers with lots of feedback. Mine cost £15.99 with free postage (in October 2013) from seller 'cateringparts' and it turned up next day. If you check out any of these listings you will see that the seller explains very clearly that there are two types of timer used on Dualit toasters, the Mi7 and Mi2, and to ensure easy replacement you need to get the correct one. And the only way to do that is to look inside your toaster to check which is used. You can try shining a torch in through the slots at the back of the toaster, or from below, to see if you can tell which is used. But I found this didn't make me absolutely sure which it was. The really sure way is to remove the bottom plate of the toaster (as below) so you can get a really clear look. This really isn't hard but as a shortcut or a double check, another way is to check which type of screw is used to hold the timer into position. I've shown both methods below, before moving on to the main replacement instructions. So, we're about to start work. You will notice on the picture above that the toaster's plug is nowhere near an electrical socket!. Unplug yours now! Empty the crumb tray, and put it aside. Try to find somewhere well lit and flat. If you put the whole toaster on a cloth that's a good plan to catch the inevitable crumbs, any falling nuts and bolts, and to protect toaster and table from scratches. As you see I just used the kitchen worktop. Have you unplugged the toaster? Do so without fail, at risk of death! Checking which timer type is used: method 1 (remove the bottom plate)Turn the toaster upside down. Now remove the six screws, circled.
Lift off the cover plate. You'll now see the insides of the toaster revealed. Take a few moments to study it and get an idea what's going on.
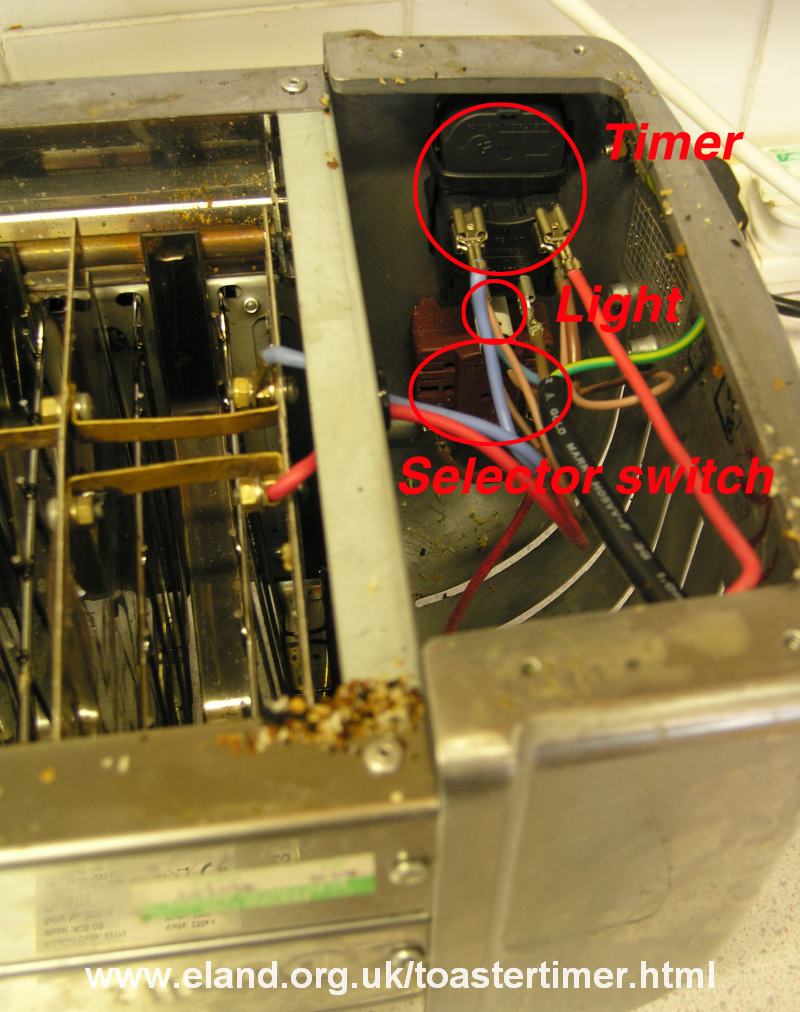
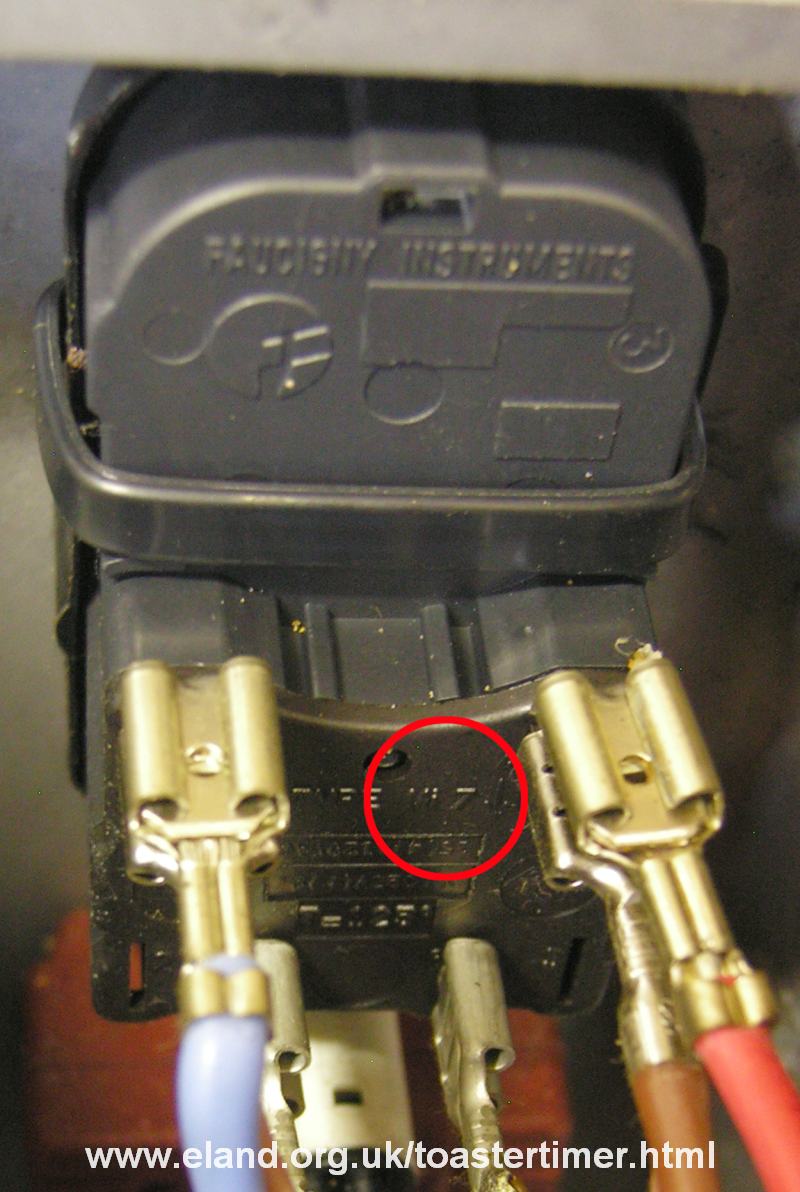
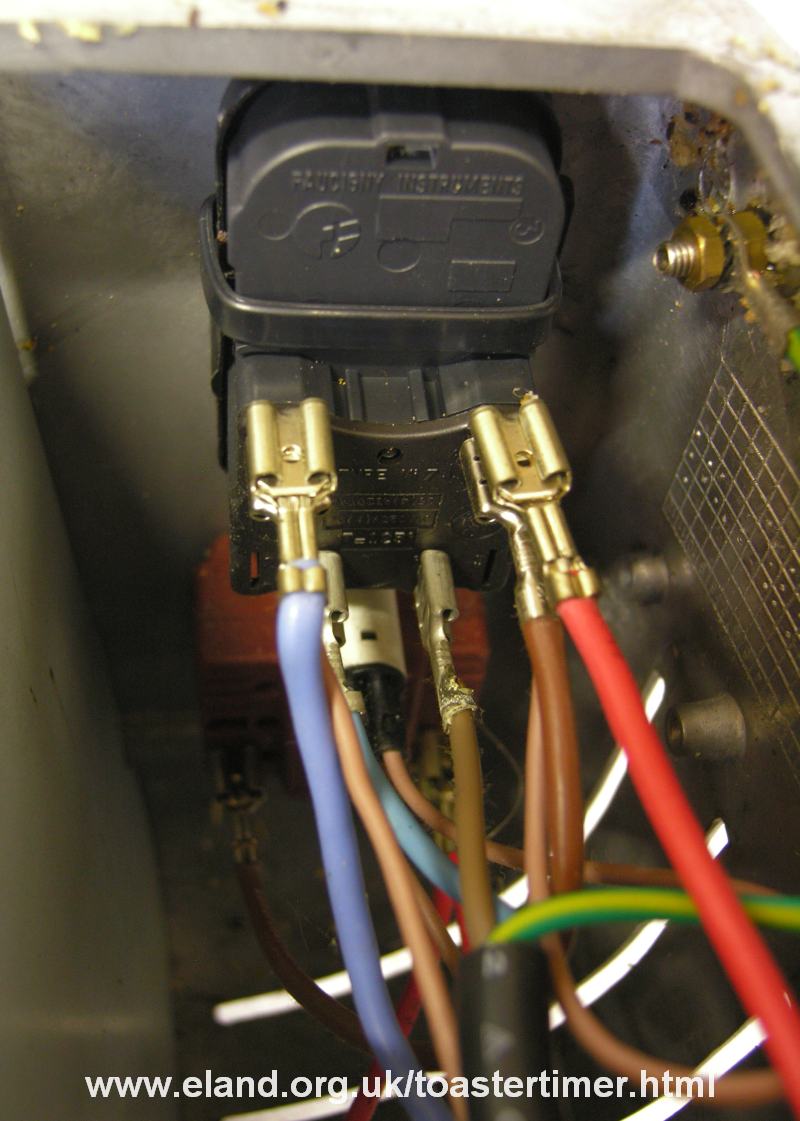
To the right is the electrical compartment, and from top to bottom there are the timer, the red light, and the selector switch, all connected via a mess of wires:
At this stage it's clear by comparison with the pictures in the ebay listings that the timer is a Mi7 on my toaster. 'Mi7' is even just legible (circled) moulded into the plastic on the back! Some previous owner seems to have put a cable tie around the timer - yours probably won't have this.
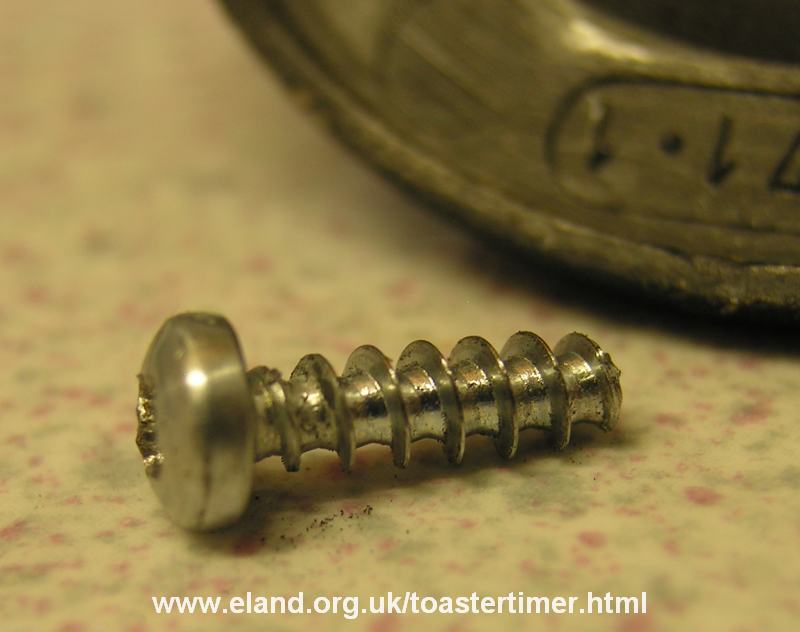
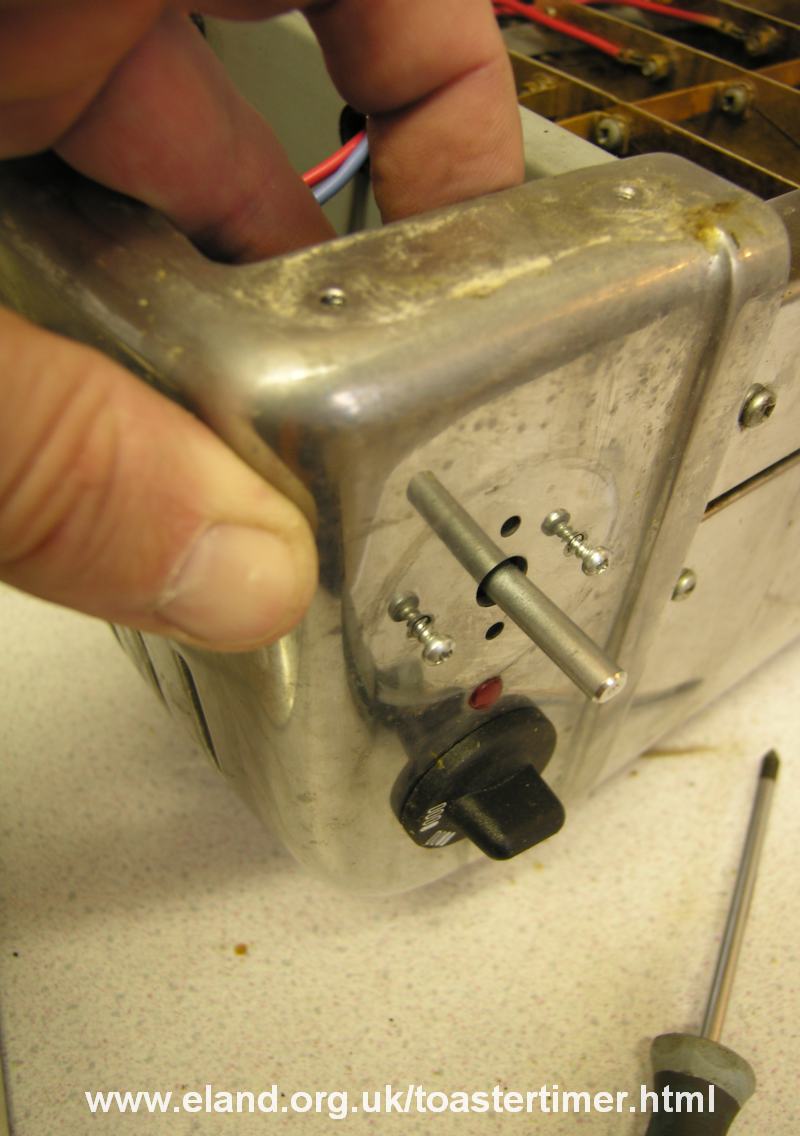
But we can also double check: Checking which timer type is used: method 2 (screw type)Turn the toaster back over, so the timer knob is facing you.
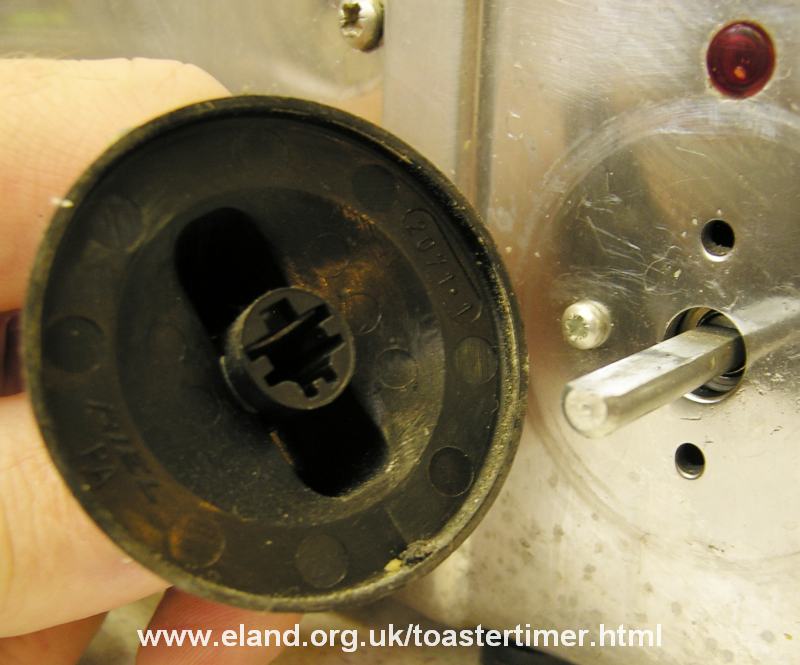
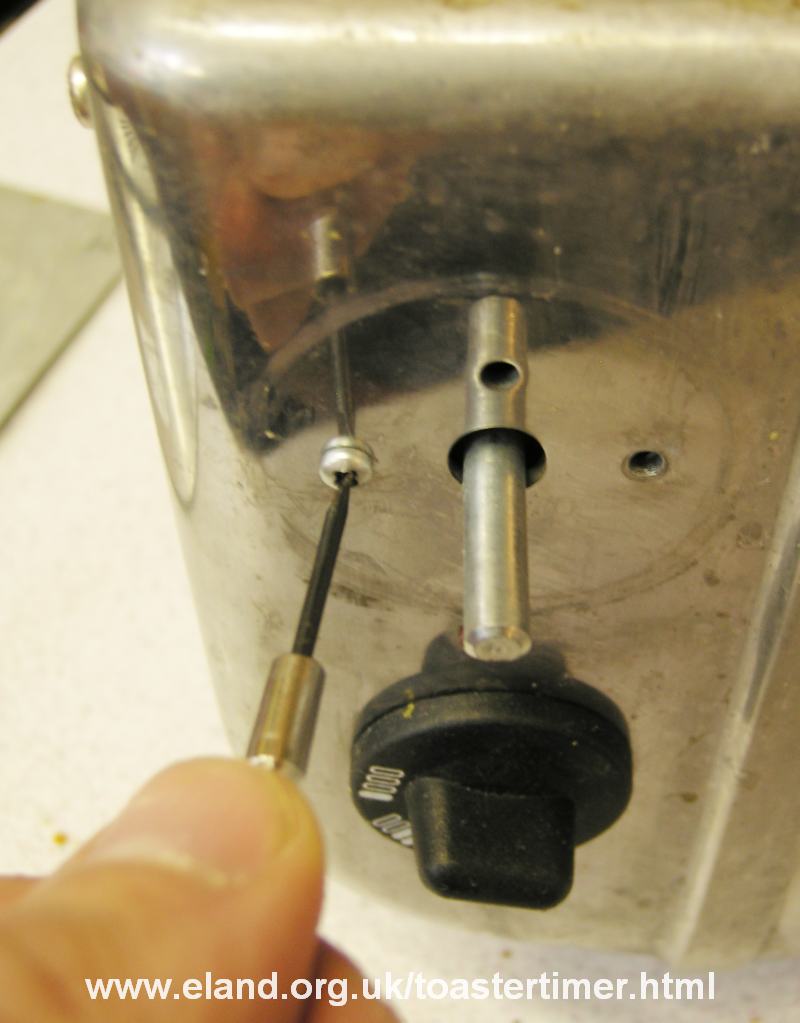
Grip the timer knob firmly and pull it straight off. Don't worry if it needs a firm pull: it's designed to be removed like this. Once it's off, take a close look:
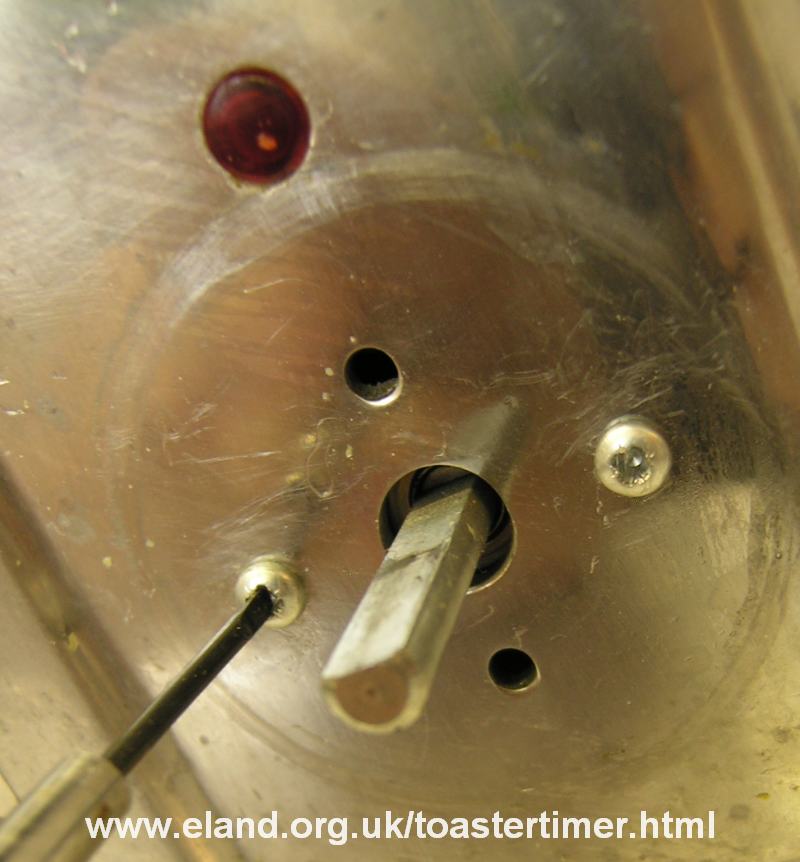
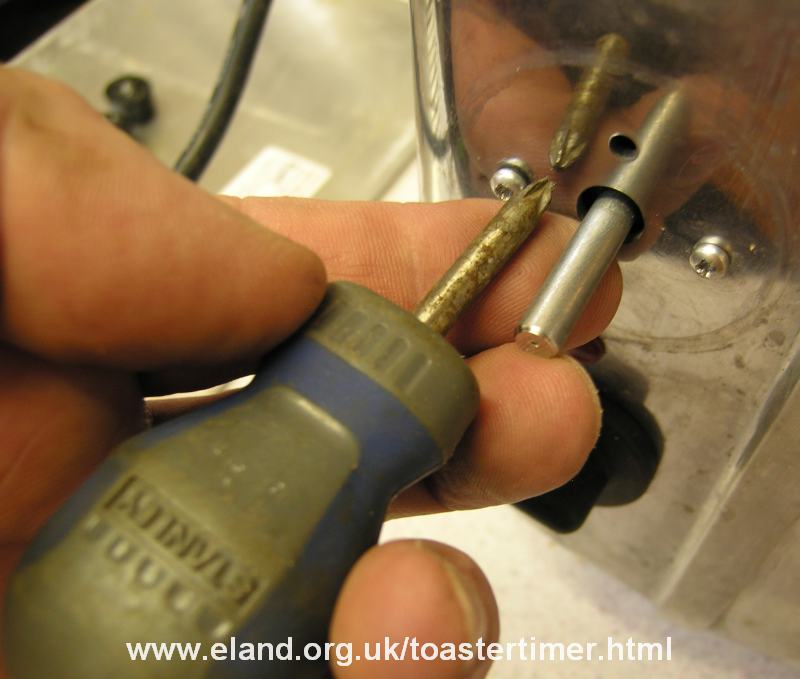
As you'll see, there's a flat on the timer shaft, and the knob moulding includes a little flat bit of spring steel which slides against the flat on the shaft, while providing a good degree of friction to keep it in place and play-free. Anyway, set the knob aside for now, and undo one of the screws next to the timer shaft:
Timer replacementOK, you should now have ordered (and received) the correct replacement timer unit. So let's move on to the main event, actually replacing the timer. If you haven't already done so, with the toaster upside down remove the bottom plate by unscrewing the six screws circled.
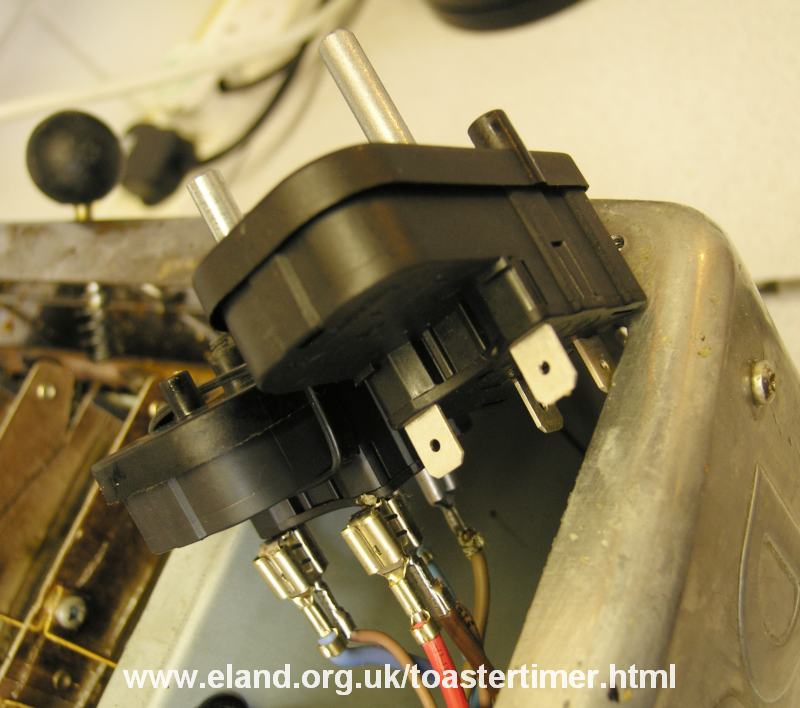
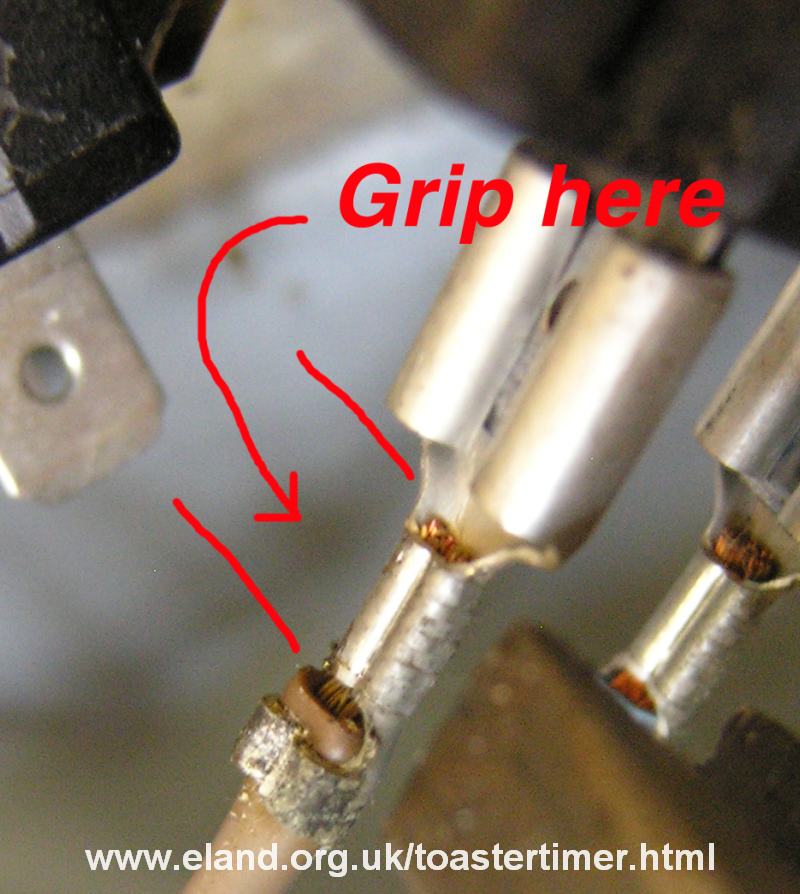
If you do damage one of the connectors, or even worse pull it off its wire, then unless you have, and know how to use, an electrician's crimping kit, I strongly recommend you take your toaster to a proper electrician or service agent for repair. It's not safe to bodge this sort of repair: these wires carry mains electricity and if the connectors are not secure it can be lethal. But if you've been careful, there should be no problem. Keep on transferring wires over until they're all done. As you transfer the last one, remove the old timer and set aside. Compare the newly wired in timer with your original digital photo if you want to double check:
Now ease the new timer into place, with the shaft through its hole. Take the two screws which you removed when releasing the original timer, and carefully start them in the holes in the new timer: a torch can help so you can see when the holes are aligned. Note that the screws are what's called 'self-tapping', meaning that they form their own threads in the soft plastic of the timer housing. Initially, just get them both started:
Now turn the toaster back over:
You can now plug it in and test your work! |
|